Quick Summary: Choosing the right battery for your 4 wheeler is key to reliable performance. This guide explains 4 wheeler battery types, sizes, maintenance, and replacement to keep you powered up for any adventure. Get informed and ride with confidence!
Hitting the trails in your 4 wheeler is a thrill, but a dead battery can quickly put a damper on your fun. It’s a common problem that can leave you stranded far from home. Don’t worry, though! Understanding the basics of 4 wheeler batteries doesn’t have to be complicated. We’re here to walk you through everything you need to know, from picking the perfect battery to keeping it in top shape. Get ready to power your next adventure with this easy-to-follow guide.
Understanding Your 4 Wheeler’s Battery: The Heart of Your Ride
Your 4 wheeler’s battery is more than just a box of power; it’s the engine starter and the electrical system’s backbone. When you turn the key, it sends a surge of energy to crank the engine. Then, your alternator takes over to keep everything running. But what happens when that battery starts to fade or fails completely? Understanding what makes a 4 wheeler battery tick is the first step to avoiding muddy situations.
Think of it like your own energy levels. You need the right fuel and rest to perform your best. Your 4 wheeler’s battery needs consistent power and proper care to deliver the juice your machine needs, whether you’re crawling over rocks or zipping through mud. We’ll break down the different types and what to look for, so you can make informed decisions.
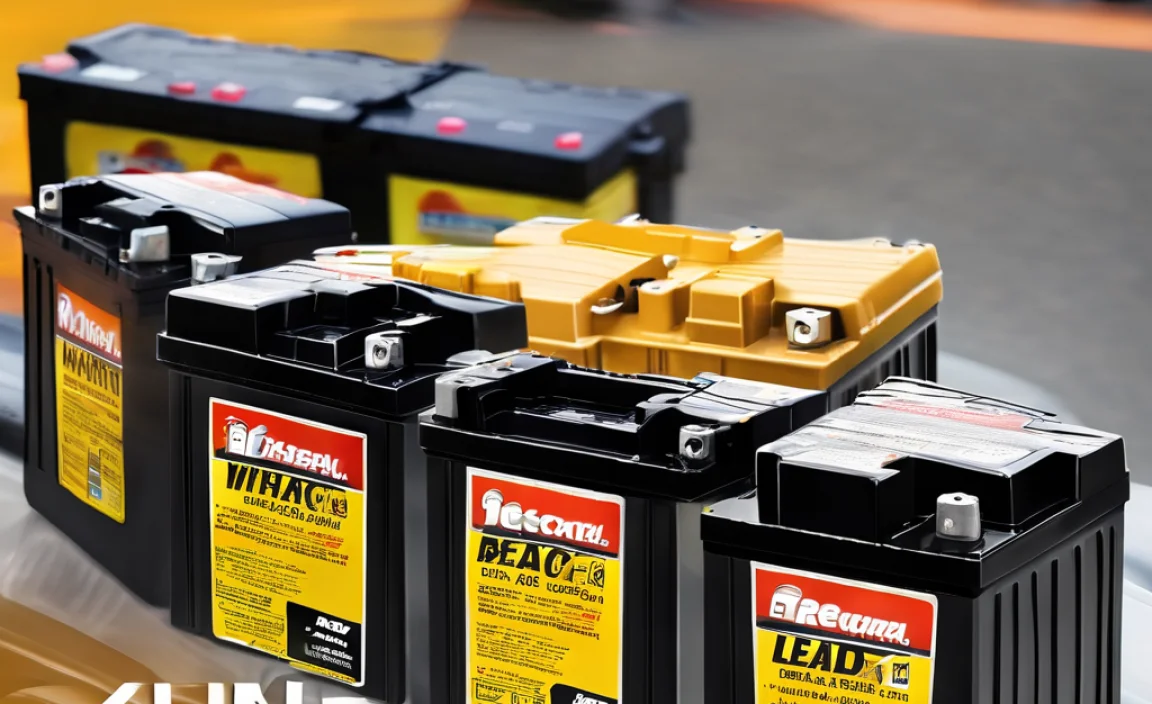
Types of 4 Wheeler Batteries: Finding the Right Fit
Not all batteries are created equal, and for your 4 wheeler, the type of battery matters a lot. The most common types you’ll encounter are flooded lead-acid and sealed, maintenance-free batteries. Each has its own pros and cons, and your 4 wheeler’s make and model might even suggest a preferred type.
Flooded Lead-Acid Batteries
These are the traditional batteries. They have cells that are not sealed, meaning you can usually check and top up the electrolyte levels with distilled water. They are often more affordable upfront.
- Pros: Typically less expensive, can be serviced to extend life (if maintained properly).
- Cons: Require regular maintenance (checking water levels), can spill corrosive acid if tipped, need to be kept upright, and can produce gases during charging.
Sealed Maintenance-Free (SMF) Batteries
These batteries, often referred to as VRLA (Valve Regulated Lead-Acid) batteries, come in two main sub-types: AGM (Absorbent Glass Mat) and Gel. They are designed to be virtually maintenance-free because the plates are sealed and the electrolyte is absorbed into fiberglass mats or gelled. This makes them highly vibration-resistant and spill-proof, which is a huge plus for off-road vehicles like 4 wheelers that experience a lot of jostling. AGM batteries are generally the preferred choice for modern 4 wheelers due to their performance and durability.
- Pros: Maintenance-free, spill-proof, highly vibration-resistant, can be mounted in various positions (though upright is still best for longevity), and offer good power output.
- Cons: Typically more expensive than flooded batteries, and if damaged or improperly charged, they can be difficult to “repair.”
For most 4 wheeler applications, especially those that face rough terrain and vibration, an AGM battery is usually the best bet. They offer a great balance of performance, safety, and convenience.
Key Battery Specifications: What Do Those Numbers Mean?
Batteries have a lot of numbers and codes on them. Don’t let them confuse you! Let’s break down the most important ones for choosing a 4 wheeler battery:
Cold Cranking Amps (CCA)
This rating tells you how much power the battery can deliver to start your engine on a cold day. A higher CCA means a stronger starting ability, which is crucial if you ride in cooler climates or if your 4 wheeler has a larger engine. Your 4 wheeler’s owner manual will often recommend a minimum CCA rating.
Ampere-Hour (Ah)
This measures the battery’s capacity – essentially, how much energy it can store and provide over time. A higher Ah rating means the battery can power accessories for longer or sustain a load for an extended period. For 4 wheelers, it’s often about having enough juice to start the engine and run basic electrical components. You’ll typically find these values listed on the battery itself.
Voltage (V)
Most 4 wheeler batteries are 12-volt systems, just like your car. You usually won’t have to worry about this unless you’re dealing with very specialized or older equipment.
Battery Size and Terminal Configuration
This is critical for a proper fit. Batteries come in standard sizes (known as BCI groups) and have specific terminal layouts (positive and negative post positions). You need to make sure the new battery physically fits in its tray and that the cables can reach the terminals correctly. Check your owner’s manual or consult a compatibility chart to find the right group size and terminal configuration for your 4 wheeler.
Battery Maintenance: Keeping Your Power Source Healthy
Even the best battery benefits from a little TLC. Proper maintenance can significantly extend its lifespan and prevent unexpected failures. Here are some easy tips:
Cleanliness is Key
Keep the battery terminals and casing clean. Corrosion build-up on the terminals (that chalky white or blue-green crust) can prevent a good electrical connection, leading to starting problems. You can clean them with a wire brush and a mixture of baking soda and water. Some people use a special terminal protector spray afterward.
Safety First: Always wear safety glasses and gloves when cleaning battery terminals. Acid is corrosive and can cause serious injury.
Secure the Battery
Make sure your battery is securely fastened in its tray. Loose batteries can rattle around, damaging the casing and leading to premature failure, especially on a bumpy trail. Check the hold-down clamps or brackets regularly.
Check Electrolyte Levels (For Flooded Batteries)
If you have a flooded lead-acid battery, check the electrolyte levels every few months and after long rides. If the water level is below the indicator or the top of the plates, carefully add distilled water until the plates are covered. Never use tap water, as minerals can damage the battery. Lead compounds in batteries are a significant environmental concern, so proper handling and disposal are important.
Avoid Deep Discharges
Try not to drain your battery completely. This can happen if you leave lights on, have a faulty charging system, or draw too much power from accessories. Deep discharges can permanently damage lead-acid batteries, especially AGM types. If you do discharge it, recharge it promptly.
Regular Charging
If your 4 wheeler sits for extended periods, consider using a battery tender or a smart charger designed for lead-acid batteries. These devices provide a slow, controlled charge to keep the battery topped up without overcharging it, which is essential for maintaining its health.
When to Replace Your 4 Wheeler Battery
Batteries don’t last forever. Most 4 wheeler batteries will last anywhere from 3 to 5 years, depending on usage, climate, and maintenance. Here are signs that it might be time for a new one:
- Slow Engine Crank: The engine turns over slower than usual, especially on cold mornings.
- Dim Lights: Headlights or dashboard lights appear dimmer than normal, particularly when the engine isn’t running.
- Battery Warning Light: A warning light on your dashboard might illuminate, indicating a charging system or battery issue.
- Swollen Case: The battery casing looks bloated or deformed. This can happen due to extreme heat or overcharging and is a sign of significant internal damage.
- Corrosion: Excessive corrosion on the terminals that reappears quickly after cleaning.
- Age: If your battery is approaching or has passed its expected lifespan, it’s wise to consider replacing it before it fails unexpectedly.
Don’t wait until you’re stranded to think about replacement! Proactive replacement based on age or symptoms can save you a lot of hassle.
Replacing Your 4 Wheeler Battery: A Step-by-Step Guide
Replacing a 4 wheeler battery is usually a straightforward DIY job. Here’s how to do it safely and correctly.
What You’ll Need
- New battery (correct size and specs for your 4 wheeler)
- Wrench or socket set (usually 10mm or 13mm for terminals and hold-downs)
- Wire brush or battery terminal cleaner tool
- Safety glasses
- Gloves
- Battery terminal protector (optional)
- Anti-corrosion spray or grease (optional)
Step-by-Step Replacement Process
- Park Safely: Park your 4 wheeler on a level surface and turn off the engine. Engage the parking brake.
- Locate the Battery: Batteries are often under the seat, behind a panel, or in a compartment on the frame. Consult your owner’s manual if you’re unsure.
- Disconnect the Old Battery (Negative First!): This is the most critical safety step. Always disconnect the negative (-) terminal first. This prevents accidental short circuits if your wrench touches the frame while removing the positive terminal. Use a wrench to loosen the nut on the negative terminal clamp and carefully lift the cable off the post.
- Disconnect the Positive Terminal: Now, disconnect the positive (+) terminal cable in the same manner.
- Remove the Hold-Down: Locate the bracket or clamp holding the battery in place. It’s usually at the base or top of the battery. Remove the bolts or nuts securing it.
- Remove the Old Battery: Carefully lift the old battery straight out of its tray. Batteries are heavy, so lift with your legs, not your back. Be mindful of any wires or components around it.
- Clean the Tray and Terminals: Clean the battery tray to remove any dirt, debris, or corrosion. Use your wire brush or terminal cleaner to thoroughly clean the inside of both cable clamps.
- Install the New Battery: Carefully place the new battery into the tray, ensuring it sits correctly and fits snugly. Make sure the positive and negative terminals are oriented correctly for your cables.
- Secure the Hold-Down: Reinstall and tighten the hold-down bracket or clamp to secure the new battery firmly in place. It should not be able to move at all.
- Connect the New Battery (Positive First!): Now, reconnect the cables. Connect the positive (+) terminal cable first. Tighten the nut securely.
- Connect the Negative Terminal: Finally, connect the negative (-) terminal cable. Tighten the nut securely. A small spark when connecting is normal.
- Apply Terminal Protector (Optional): If you have it, apply a thin layer of battery terminal protector or anti-corrosion grease to the terminals and clamps to help prevent future corrosion.
- Dispose of the Old Battery Properly: Old batteries contain hazardous materials and should never be thrown in the trash. Most auto parts stores and recycling centers accept old batteries for proper disposal.
Once the new battery is installed, start your 4 wheeler to ensure everything is working correctly. If you’re unsure about any step, it’s always best to consult your owner’s manual or seek help from a qualified mechanic. For more information on safe battery handling, check out resources from the National Highway Traffic Safety Administration.
Troubleshooting Common Battery Issues
Even with good maintenance, you might encounter battery problems. Here are a few common issues and how to approach them:
My 4 Wheeler Won’t Start, and the Lights Are Dim or Off
This is a classic sign of a dead or very low battery. Check the battery terminals for corrosion. If they’re clean, try charging the battery with a suitable charger. If it doesn’t hold a charge, it’s likely time for a replacement.
My 4 Wheeler Starts, But Dies Soon After
This often points to a problem with the charging system (alternator or stator) rather than the battery itself. The battery might provide enough power to start, but if the alternator isn’t recharging it while the engine runs, it will eventually die. A mechanic can test your charging system.
My Battery Keeps Dying Even When I’m Not Using the 4 Wheeler
This suggests a “parasitic draw” – something is silently draining power from the battery even when the ignition is off. This could be a faulty accessory, a stuck relay, or an issue with the electrical system. Diagnosing parasitic draws can be tricky and often requires specialized tools and knowledge.
My Battery Seems Corroded Again Very Quickly
While a light coating of corrosion can be normal over time, rapid and severe corrosion might indicate that the battery is overcharging or leaking gasses. This could be a sign of a faulty battery or a problem with your charging system.
Comparing Battery Brands and Features
When shopping for a replacement, you’ll see various brands. While specific brand loyalty can be debated, look for well-known manufacturers that offer good warranties and have a reputation for reliability in powersports applications. Some key features to consider:
- Warranty: A longer warranty (e.g., 1-3 years) often indicates the manufacturer’s confidence in their product.
- Type: As discussed, AGM batteries are generally preferred for their durability and maintenance-free nature.
- Specifications: Ensure the CCA and Ah ratings meet or exceed your 4 wheeler’s requirements.
- Fitment: Double-check the battery group size and terminal configuration for your specific model.
It can be helpful to check online reviews or ask fellow 4 wheeler enthusiasts for recommendations on brands that have performed well for them.
Understanding Battery Ratings: A Quick Comparison
To help visualize battery performance, here’s a fictional comparison of common battery types you might find, keeping in mind that actual performance varies by specific model and brand.
| Battery Type | Typical CCA Range | Typical Ah Range | Maintenance Required | Vibration Resistance | Cost (Relative) |
|---|---|---|---|---|---|
| Flooded Lead-Acid | 150 – 300 | 12 – 20 | High (Check/Add Water) | Moderate | $ |
| AGM (Absorbent Glass Mat) | 200 – 350+ | 14 – 25+ | None (Sealed) | Excellent | $$ |
| Gel | 160 – 300 | 12 – 22 | None (Sealed) | Good | $$$ |
Remember, these are general ranges. Always refer to your 4 wheeler’s specifications for the recommended battery type and ratings.
Beyond Your 4 Wheeler: Powering Other Devices
While this guide focuses on 4 wheeler batteries, the principles of power management extend to our everyday electronics. Just like your 4 wheeler’s battery needs to deliver consistent power, so do your phone and other gadget batteries. Understanding these components can make life a lot easier:
Phone Batteries
Most modern phones use lithium-ion batteries. These are rechargeable and offer good energy density. To get the most out of them, avoid extreme temperatures, and try not to let them drain completely too often. If your phone’s battery life has dropped significantly, it might be time for a replacement, which can often be done by a professional.
Chargers and Adapters
Using the correct charger is vital for both your phone and your 4 wheeler’s battery. For your phone, always use the charger that came with it or a reputable, certified alternative. Off-brand chargers can sometimes provide incorrect voltage or current, which can damage your phone or its battery over time. For your 4 wheeler, using a smart charger designed for lead-acid batteries ensures it’s charged safely and efficiently, preventing overcharging that can harm the battery.
Power Banks
These portable chargers are lifesavers for keeping your phone and other small electronics powered up on the go. When choosing a power bank, consider its capacity (measured in mAh), which tells you how many times you can recharge your devices. Look for models with safety features built-in to prevent overheating or short circuits, similar to how you’d want your vehicle battery to be safe.
The common thread across all these power sources is the need