Need a new battery for your Dyson DC59? Replacing it is simpler than you think! This guide provides essential power information, helping you choose the right battery and get your vacuum running like new again, ensuring continued cleaning power and convenience.
Is your Dyson DC59 losing its cleaning power faster than you can vacuum? Does it seem like the battery just doesn’t hold a charge like it used to? You’re not alone! Many Dyson DC59 owners encounter this common issue. It can be frustrating when your trusty vacuum suddenly quits mid-task, leaving you with a half-cleaned floor and a dead battery.
But don’t worry! Getting your Dyson DC59 back to its powerful best is achievable, and I’m here to guide you every step of the way. We’ll cover everything you need to know, from understanding the different battery options to safely installing a new one.
This guide will simplify the process, making sure you feel confident and equipped to tackle battery replacement. Let’s dive into making sure your Dyson DC59 has the power it needs!
Understanding Your Dyson DC59 Battery
The Dyson DC59, like many cordless vacuums, relies on a rechargeable lithium-ion battery pack. Over time, these batteries naturally degrade. This means they can’t hold as much charge, leading to shorter runtimes. Think of it like your smartphone battery – after a few years, it doesn’t last all day like it used to. The battery in your Dyson DC59 works similarly.
Original Dyson batteries are designed specifically for the DC59 model, ensuring optimal performance and compatibility. However, replacements can come from various sources, and understanding the differences is key to making an informed choice.
Why Do Batteries Degrade?
Several factors contribute to a battery’s lifespan and eventual degradation:
- Charge Cycles: Every time you charge and discharge the battery, it counts as a cycle. Batteries have a finite number of these cycles before their capacity reduces.
- Heat: Exposing the battery to high temperatures, either during charging or use in very hot environments, can accelerate degradation.
- Deep Discharges: Letting the battery completely drain regularly can put more stress on it over time.
- Age: Even if not used heavily, the chemicals within a lithium-ion battery slowly break down over years.
It’s a natural process, but it means eventually, you’ll need to consider a replacement to keep your Dyson DC59 working at its best.
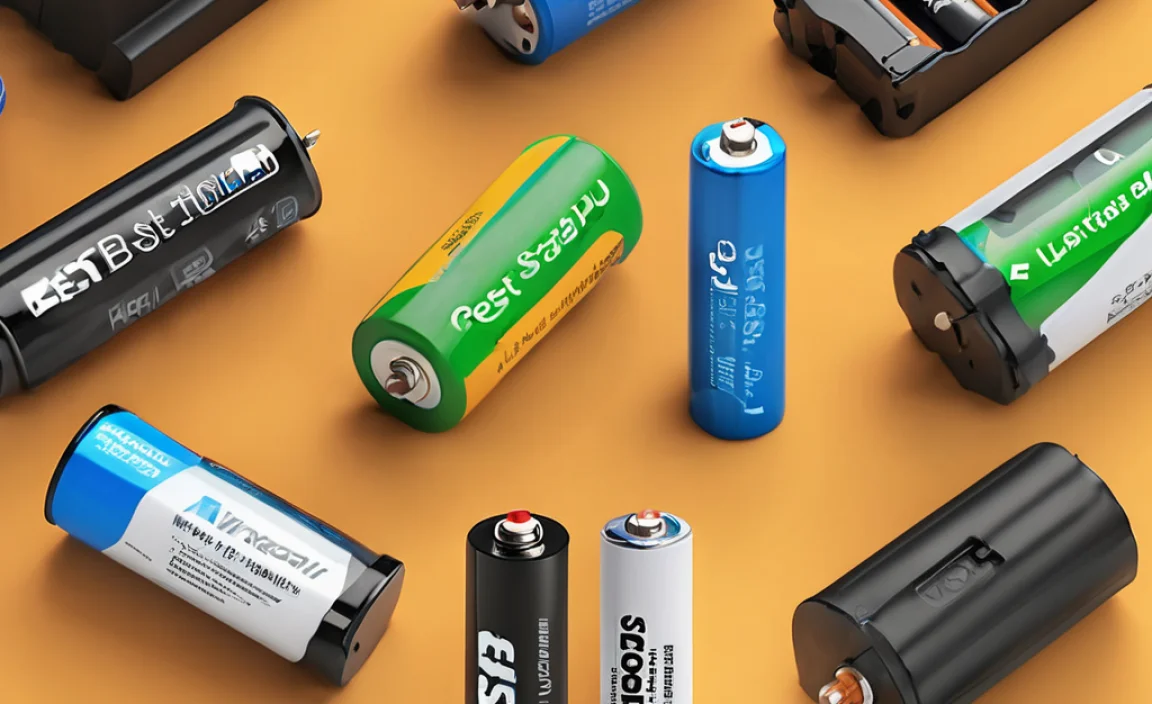
Original vs. Compatible Batteries
When you need a new battery for your Dyson DC59, you’ll typically find two main types:
- Genuine Dyson Batteries: These are made by Dyson and are guaranteed to fit and function perfectly with your DC59. They often come with a warranty and are built to the manufacturer’s specifications.
- Compatible (Aftermarket) Batteries: These are made by third-party manufacturers. They are designed to be a functional equivalent to the original. They can often be more affordable, but quality can vary. It’s crucial to choose reputable brands when opting for compatible batteries.
For the best performance and peace of mind, a genuine Dyson battery is usually the safest bet. However, if budget is a concern, a well-regarded compatible battery can be a good option.
What to Look for in a Dyson DC59 Battery
Not all replacement batteries are created equal. Here are some important features to consider before you buy:
- Voltage and Capacity (mAh): Ensure the voltage matches your original DC59 battery (typically 21.6V for Dyson models like the DC59). The capacity, measured in milliampere-hours (mAh), indicates how long the battery will last on a single charge. A higher mAh generally means longer runtimes. Sometimes, aftermarket batteries offer higher mAh than the original.
- Compatibility: Double-check that the battery is specifically listed as compatible with the Dyson DC59. Some batteries are designed for multiple Dyson models, so verifying compatibility is crucial to avoid purchase errors.
- Safety Features: Look for batteries that mention built-in protection against overcharging, over-discharging, and short circuits. Reputable sellers will highlight these safety assurances.
- Warranty: A good warranty period (e.g., 12 months or more) is a strong indicator of a manufacturer’s confidence in their product’s reliability.
- Customer Reviews: Always read reviews from other buyers. They offer real-world insights into the product’s performance and longevity.
Understanding Battery Specifications
Let’s break down those numbers you’ll see on battery listings:
- Voltage (V): This is the electrical potential. Your Dyson DC59 needs a battery with the correct voltage to operate safely and effectively. For the DC59, this is typically 21.6 Volts. Using a battery with the wrong voltage could damage your vacuum.
- Capacity (mAh – milliampere-hours): This tells you how much electrical charge the battery can hold and deliver over time. A higher mAh rating means the battery can power your vacuum for longer before needing a recharge. For example, a 3000mAh battery will generally last longer than a 2000mAh battery.
- Watt-hours (Wh): Sometimes, you might see this. It’s calculated by multiplying Voltage (V) by Capacity (Ah – Ampere-hours, which Capacity in mAh divided by 1000). Wh gives a more direct comparison of total energy stored.
For your Dyson DC59, aiming for a 21.6V battery is essential. For capacity, a higher mAh is generally desirable if you want longer cleaning sessions.
How to Replace Your Dyson DC59 Battery: A Step-by-Step Guide
Replacing the battery in your Dyson DC59 is a straightforward process. You won’t need many tools, and it’s designed to be user-friendly. Let’s get your vacuum powered up again!
Tools You’ll Need:
- Your new Dyson DC59 compatible battery
- A small Phillips head screwdriver (often a size PH0 or PH1)
- A soft cloth (optional, for cleaning)
- Safety glasses (always a good idea when working with electronics)
Step-by-Step Instructions:
Safety First: Before you begin, ensure your Dyson DC59 is switched off and disconnected from any charger. It’s also a good practice to wear safety glasses.
- Locate the Battery: Turn your Dyson DC59 upside down. You’ll see the main body of the vacuum, where the dustbin is attached. The battery pack is usually located at the rear end of this main body, often visible as a distinct unit that slides or clips into place.
- Remove the Battery Latch: Look for a small latch or button on the battery itself or where it connects to the vacuum body. Press and hold this latch.
- Slide Out the Old Battery: While holding the latch down, gently slide the battery pack away from the vacuum body. It should detach smoothly. If it feels stuck, wiggle it gently or ensure the latch is fully depressed. Sometimes, gently pushing upwards or downwards can help it release.
- Prepare the New Battery: Unpack your new replacement battery. Inspect it to ensure it looks identical in shape and connector to the original one you just removed.
- Insert the New Battery: Align the new battery pack with the slot on the vacuum body. Make sure the orientation is correct – you can usually tell by the shape of the battery and the slot.
- Slide and Click: Gently slide the new battery into place. You should feel it click or seat firmly into position when it’s fully inserted. Ensure the latch engages to secure it.
- Test the Battery: Switch on your Dyson DC59 to ensure it powers up. Check that it sounds normal and that the indicator lights (if any) on the battery are functioning as expected.
- Charge Fully: Once the new battery is installed and working, place your Dyson DC59 on its charger and let it charge fully before its first intensive use. This helps condition the new battery.
If you’re unsure about any step, don’t hesitate to look up videos online. Many manufacturers and users post helpful visual guides.
Charging and Maintaining Your Dyson Battery
Proper charging habits can extend the life of your new Dyson DC59 battery, whether it’s an original or a compatible replacement. Here’s how to keep it in top shape:
Best Charging Practices:
- Use the Correct Charger: Always use the charger that came with your Dyson DC59 or a certified replacement charger specifically designed for your model. Using an incorrect charger can lead to damage or incomplete charging.
- Charge After Use: It’s generally best to recharge your Dyson battery after each use, or at least whenever the charge gets low. Avoid frequently letting the battery drain completely to 0%.
- Avoid Extreme Temperatures: Charge your vacuum in a room that isn’t excessively hot or cold. Extreme temperatures can negatively impact battery health. For instance, avoid charging in direct sunlight or a freezing garage.
- Don’t Overcharge (Modern Batteries): Lithium-ion batteries, like the one in your DC59, have built-in circuitry to prevent overcharging. Once they reach 100%, they stop accepting charge. So, leaving it on the dock for a while after it’s full won’t typically harm it, but it’s not necessary for battery longevity.
- Store Properly: If you need to store the vacuum for an extended period (e.g., more than a month), charge the battery to about 40-50% and store it in a cool, dry place. Avoid long-term storage with a full or completely empty battery.
Signs Your Battery Might Be Failing:
You’ll know it’s time for a new battery when you notice:
- The vacuum runs for much shorter periods than it used to.
- The battery indicator lights flash differently or indicate a fault.
- The vacuum cuts out unexpectedly, even when the battery indicator shows it should still have power.
- The battery no longer holds any charge at all.
Dyson DC59 Battery Compatibility
While this guide focuses on the Dyson DC59, it’s helpful to know that Dyson uses similar battery types across a range of their cordless models. However, always verify compatibility for your specific vacuum. The DC59 is part of the Dyson V6 vacuum cleaner family, which shares many components.
Here’s a general look at battery compatibility, though you must confirm for your exact model:
| Dyson Model | Battery Type | Notes |
|---|---|---|
| Dyson DC59 | 21.6V Lithium-ion | Original model, often uses a specific battery with a slide-in mechanism. |
| Dyson V6 (various models: Animal, Absolute, etc.) | 21.6V Lithium-ion | Most V6 batteries are interchangeable with the DC59’s battery due to the shared platform. |
| Dyson V7 | 21.6V Lithium-ion | Similar voltage, but the connection and housing might differ. Generally NOT compatible with V6/DC59 without modification. |
| Dyson V8 | 21.6V Lithium-ion | Different connector and form factor. NOT compatible with V6/DC59. |
| Dyson V10/V11/V15 | 25.2V (V10/V11) or 29.6V (V15) Lithium-ion | Higher voltage and different connector. NOT compatible with V6/DC59. |
This table highlights why it’s crucial to buy a battery explicitly listed for the Dyson DC59 or Dyson V6. Always check product descriptions carefully!
Troubleshooting Common Battery Problems
Even with a new battery, you might encounter minor issues. Here are common problems and how to solve them.
Battery Not Charging
- Check the Charger Connection: Ensure the charger is firmly plugged into both the wall socket and the vacuum’s charging port.
- Clean the Contacts: Gently clean the metal charging contacts on both the battery and the vacuum with a soft, dry cloth. Tiny dust or debris can sometimes interrupt the connection.
- Try a Different Outlet: Rule out a faulty wall socket by trying another one.
- Battery Health: If the battery is very old or faulty, it might not accept a charge.
- Charger Issue: If you have another compatible Dyson charger, try using that to see if the original charger is the problem.
Vacuum Cuts Out Quickly
- New, Faulty Battery: Even new batteries can sometimes be defective. If this happens with a brand-new battery, contact the seller or manufacturer for a replacement. You can find more information on battery safety and replacement from resources like the U.S. Department of Energy, which discusses battery technology fundamentals.
- Incorrect Battery Capacity: An aftermarket battery with a falsely advertised high capacity might not perform as expected.
- Vacuum Motor Issue: Less commonly, an issue with the vacuum cleaner’s motor itself could cause it to draw too much power, leading to premature shutoff.
- Battery Not Seated Correctly: Double-check that the new battery is securely clicked into place.
Flashing Indicator Lights
Many Dyson batteries have LED indicators. A specific flashing pattern often signifies an error. The exact meaning can vary, but common issues include:
- Overheating: The battery might have become too hot during charging or use. Let it cool down completely before trying again.
- Faulty Battery: The lights could indicate an internal fault within the battery pack itself.
- Connection Problem: Similar to charging issues, poor contact can sometimes trigger error lights.
If the lights indicate a fault and you’ve tried basic troubleshooting, it’s often a sign that the battery needs to be replaced or returned.
Frequently Asked Questions (FAQs)
Q1: How long should a Dyson DC59 battery last on a full charge?
A1: A brand-new genuine Dyson DC59 battery typically offers up to 26 minutes of fade-free suction in standard mode, or up to 20 minutes when using a motorised tool. Older or aftermarket batteries may have different performance times.
Q2: Can I use a battery from another Dyson model for my DC59?
A2: It depends on the model. Most Dyson V6 series batteries (like the ones for the DC59) are interchangeable. However, batteries from newer series like the V7, V8, V10, or V11 are generally NOT compatible due to differences in connectors and voltage.
Q3: How do I know if my Dyson DC59 battery needs replacing?
A3: Your battery likely needs replacing if your vacuum runs for significantly less time than it used to, cuts out unexpectedly, or fails to hold a charge at all. Flashing indicator lights can also signal a battery issue.