Quick Summary
Secure battery trays for cars are crucial for holding your car battery safely in place. They prevent movement, protect against damage, and ensure your car runs reliably. This guide explains why they are essential and how to keep them in tip-top shape.
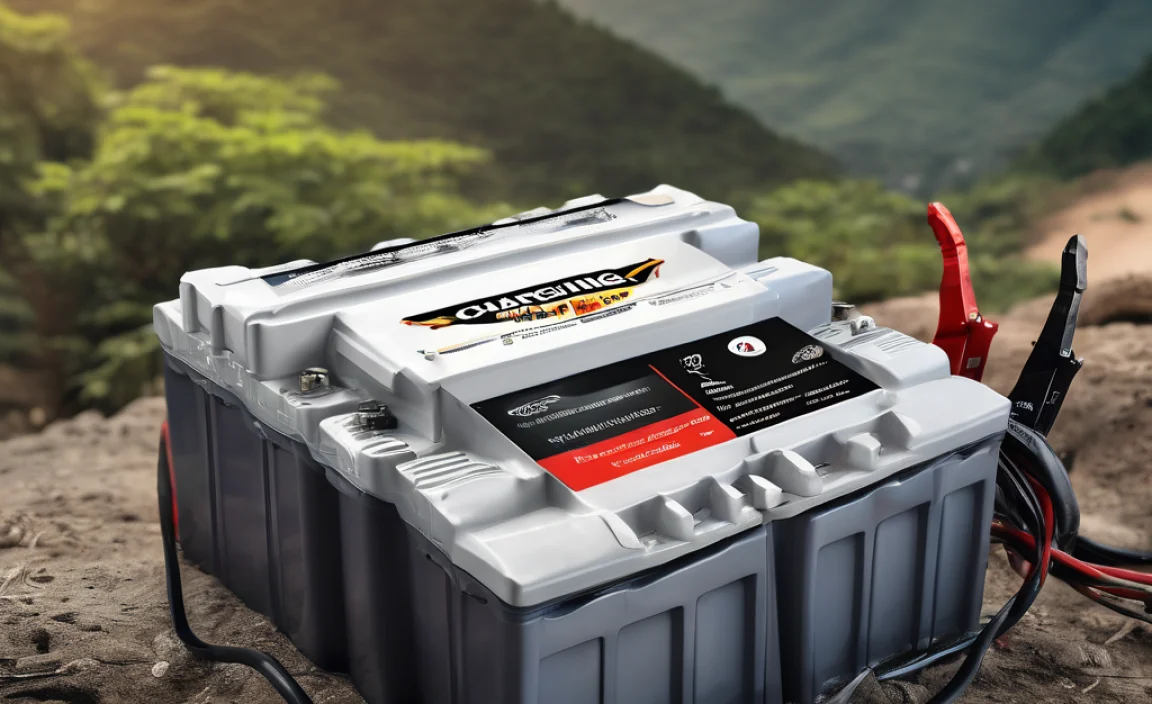
Hello there! Roy Walker here. Let’s talk about something super important for your car that often gets overlooked: the battery tray. It might sound simple, but this piece of automotive hardware plays a big role in keeping your vehicle running smoothly and safely. Ever wonder what stops that heavy car battery from bouncing around under the hood, especially when you hit a bumpy road? That’s the job of the battery tray!
A loose or damaged battery can cause all sorts of problems, from electrical glitches to serious safety hazards. But don’t worry, keeping yours in good condition is totally doable. We’ll break down exactly why battery trays are so important, how to check for issues, and what to do if yours needs attention. Stick around, and we’ll make sure your car’s power source is as secure as it can be!
=H2=Why Your Car Battery Needs a Secure Tray=H2=
Think of your car battery as the heart of your vehicle’s electrical system. It provides the power to start the engine and run all those essential electronics, from the headlights to your radio. Now, imagine that heart sloshing around inside you – not a good thought, right? The battery tray is what keeps your car battery firmly planted where it belongs, preventing it from moving, vibrating, or even falling out.
This stability is more than just about keeping things tidy. A securely held battery is vital for several key reasons:
=H3=Safety First: Preventing Electrical Shorts and Fires=H3=
Car batteries contain corrosive acid and can produce flammable hydrogen gas, especially when charging. If a battery shifts and its terminals touch metal parts of your car, it can cause a short circuit. This could lead to sparks, or worse, a fire. A sturdy battery tray, often with restraining straps or clamps, keeps the battery from touching anything it shouldn’t, acting as a critical safety barrier.
=H3=Protecting Your Battery and Your Car=H3=
Constant jolts and vibrations from driving, especially on rough roads, can damage the internal components of your car battery. Over time, this can reduce its lifespan and performance. A battery tray absorbs some of this shock and keeps the battery steady, helping to protect it from premature wear and tear. It also prevents the heavy battery from rattling against other engine components, which could damage them too.
Furthermore, a loose battery can cause its terminals to become disconnected. This can lead to intermittent electrical problems, stalling, or preventing your car from starting altogether. It’s like a loose connection on a smartphone charger – it just doesn’t work reliably!
=H3=Ensuring Reliable Performance=H3=
A stable connection is key for your battery to deliver consistent power. When a battery tray is doing its job, the battery’s terminals remain firmly connected to the car’s electrical system. This ensures a steady flow of power for starting the engine and running everything as it should. Think of it like keeping the connection to your favorite phone charger solid – no flickering power bars here!
=H2=Understanding Different Types of Battery Trays=H2=
Battery trays aren’t one-size-fits-all. They are designed to hold specific types and sizes of batteries and are made from various materials, each with its own pros and cons. Knowing what you have can help you spot issues or choose the right replacement.
Here are some common types you’ll find:
=H3=Material Matters: Metal vs. Plastic=H3=
Metal Trays: Traditionally, many battery trays were made of steel, often coated to resist corrosion. These are very strong and durable, capable of securely holding even the heaviest batteries. However, they can be susceptible to rust over time, especially in areas where salt is used on roads in winter.
Plastic Trays: Modern vehicles increasingly use heavy-duty plastic or composite materials for battery trays. These are lightweight, corrosion-resistant, and can be molded into complex shapes for a precise fit. While generally robust, some plastics can become brittle with age and exposure to heat or chemicals.
=H3=Securing the Battery: Mounts and Brackets=H3=
Beyond the tray itself, how the battery is held down is also important. Common methods include:
- Hold-down Clamps: These are metal or plastic brackets that fit over the top of the battery and bolt into the tray or the car’s chassis. They are the most common method for securing batteries.
- Strap Systems: Some trays use a strong, reinforced strap that goes around the battery base and latches securely to the tray.
- Integrated Designs: Some trays are designed with specific contours and lips that help cradle an identically shaped battery, often used with a simple retaining bar.
=H2=Signs Your Car Battery Tray Needs Attention=H2=
Your car did a great job warning you about the battery needing a jump start, but it won’t tell you when its tray is acting up. You need to be the detective! Regularly inspecting your battery tray can save you from bigger headaches down the road. Here’s what to look for:
Visual Clues:
- Corrosion or Rust: Especially on metal trays, look for red or brown flaking. This is a sign the protective coating is failing, and rust can weaken the tray over time.
- Cracks or Holes: Examine plastic trays for any visible cracks, especially around mounting points or the base. On metal trays, look for deep pitting or holes that indicate rust has eaten through.
- Loose Components: Check if the hold-down clamps or straps are secure. Are the bolts tight? Is the strap frayed or stretched?
Physical Signs:
- Battery Movement: When the engine is off, try to gently rock the battery. If it moves significantly within its tray, the securing system is loose or the tray itself might be damaged, causing a poor fit.
- Unusual Noises: A loose battery can sometimes rattle or clunk during driving, especially on bumps or turns. This is a worrying sign that you need to investigate immediately.
- Smells: While not always directly from the tray, any sulfuric smells (like rotten eggs) could indicate a leaking battery, often exacerbated by movement.
Performance Issues (Indirectly Related):
- Intermittent Electrical Problems: If your lights flicker, your stereo cuts out, or your car starts acting strangely with electrical components, a loose battery connection caused by a faulty tray could be the culprit.
=H2=DIY Battery Tray Inspection and Maintenance Tips=H2=
Keeping your battery tray in good shape is a great DIY task. You don’t need to be a master mechanic to do a basic check and some simple maintenance. Think of it like making sure your power bank is securely connected to your phone before a long trip – a small step for big peace of mind.
Here’s a simple procedure:
Tools You Might Need:
- Safety Glasses
- Gloves (chemical-resistant)
- Wire Brush
- Wrench or Socket Set (to loosen/tighten hold-down bolts)
- Battery Terminal Cleaner (a mild solution or baking soda/water mix)
- Rags or Paper Towels
- Optional: Metal Primer and Paint (for rust prevention on metal trays)
- Optional: Plastic Repair Kit (for minor plastic cracks)
Step-by-Step Inspection:
- Safety First: Park your car on a level surface and turn off the engine. Open the hood and locate your car battery. Make sure the engine is completely cool. Always wear safety glasses and gloves when working around a car battery.
- Assess the Securing System: Check the hold-down clamp or strap. Are the bolts tight? If they seem loose, try gently tightening them. Don’t overtighten, as this can strip threads or crack plastic parts.
- Inspect the Tray for Damage: Carefully look for any signs of rust, cracks, or corrosion on the tray itself. Gently tap on it with a plastic handle of a tool to listen for any soft or hollow spots that might indicate rust-through.
- Check for Corrosion: Look at the battery terminals and the cables connecting to them. If you see any white or greenish powdery substance, this is battery acid corrosion. While this is on the terminals, severe corrosion can sometimes affect the tray over time.
- Clean if Necessary: If there’s minor corrosion on the tray, use a wire brush to gently scrub it away. If you find corrosion on the battery terminals, clean them with a battery terminal cleaner or a paste made from baking soda and water. Rinse with clean water and dry thoroughly.
- Test for Looseness: Once you’re confident the hold-down is snug, try to wiggle the battery. It should feel firmly seated with minimal to no movement.
Maintenance Tips:
- Regular Checks: Make it a habit to quickly inspect your battery tray every few months, or whenever you check your other fluid levels.
- Rust Prevention: If you have a metal tray with minor surface rust, clean it well, apply a rust inhibitor or primer, and then a coat of durable paint (like chassis paint) to prevent further decay. This is an excellent way to extend its life.
- Keep it Clean: Regularly clean away any debris, leaves, or dirt that accumulates around the battery and tray. This debris can hold moisture and accelerate corrosion.
=H2=When to Replace Your Car Battery Tray=H2=
Sometimes, a quick clean and tighten isn’t enough. If your battery tray shows significant signs of damage, it’s time for a replacement. Driving with a compromised tray is a safety risk you don’t want to ignore.
Here are conditions that typically signal a need for replacement:
- Extensive Rust/Corrosion: If a metal tray is heavily rusted, has holes, or is crumbling, it’s no longer safe or effective.
- Deep Cracks or Fractures: A plastic tray with significant cracks, especially near mounting points, can fail under stress.
- Warping or Distortion: If the tray appears bent, warped, or out of shape, it might not hold the battery securely or allow the hold-down to function properly.
- Missing or Damaged Parts: If bolts, brackets, or straps are missing, damaged beyond repair, or if the tray itself has broken mounting points, it needs replacing.
Replacing a battery tray is often a job a competent DIYer can tackle, but it might require removing the battery first. If you’re not comfortable with this, a local mechanic can handle it quickly.
=H2=How to Replace a Car Battery Tray (Step-by-Step)=H2=
Replacing a car battery tray involves a few careful steps. It’s often easier than it sounds, but safety and accuracy are key. This is a great project to tackle if you’re comfortable working with basic tools and have a bit of patience.
Before You Start: Choose the Right Replacement Tray
You’ll need to get the correct replacement tray for your specific car make, model, and year. You can usually find this information in your car’s owner’s manual or by looking up parts online using your vehicle’s details. Ensure it matches the size and mounting points of your original tray.
Tools You Will Likely Need:
- Safety Glasses
- Gloves (chemical-resistant)
- Wrench or Socket Set (for battery terminals, hold-down, and tray bolts)
- Pliers (may be needed for clips or stubborn parts)
- Wire Brush
- Battery Terminal Cleaner
- New Battery Hold-down hardware (if not included with the tray)
- Penetrating Oil (optional, for rusted bolts)
- Jack and jack stands (if the tray is located underneath the vehicle)
- Torque Wrench (recommended for battery terminal tightening)
Step-by-Step Replacement Process:
- Disconnect the Battery: This is the MOST IMPORTANT step. Always disconnect the negative (-) terminal first, then the positive (+) terminal. This prevents accidental sparks. Loosen the terminal clamps with a wrench and carefully remove the cables from the battery posts. You might want to secure them away from the battery so they don’t accidentally touch the terminals.
- Remove the Battery: Once the cables are disconnected, remove the battery hold-down clamp or strap. Carefully lift the battery straight up and out of the old tray. Batteries are heavy, so be careful not to strain yourself. Place it on a sturdy, level surface away from your work area.
- Remove the Old Tray: With the battery out of the way, you can now access the old tray’s mounting bolts. These can often be rusted and stubborn. Use penetrating oil if needed and let it soak. Use the appropriate wrench or socket to remove the bolts securing the tray to the car’s chassis. Some trays might be clipped in or require access from underneath the car if they are part of a battery box assembly. If the tray is located underneath, you may need to lift the vehicle safely with a jack and secure it with jack stands according to your vehicle’s manual.
- Clean the Mounting Area: Before installing the new tray, use a wire brush to clean the mounting surface on the vehicle’s chassis. Remove any rust, debris, or old sealant for a clean fit.
- Install the New Tray: Position the new battery tray into place. Align the mounting holes with those on the chassis. Reinstall the mounting bolts. If your tray came with new hardware, use that. Tighten the bolts securely, but avoid overtightening. If your vehicle requires specific torque settings, use a torque wrench.
- Reinstall the Battery: Carefully lower the battery back into the newly installed tray. Ensure it’s seated correctly.
- Secure the Battery: Reinstall the battery hold-down clamp or strap. Tighten it to firmly secure the battery in place. Again, avoid overtightening, especially if it’s a plastic part. The battery should not move at all.
- Reconnect the Battery Cables: Reattach the positive (+) terminal cable first, then the negative (-) terminal cable. Tighten the terminal clamps securely. Making sure the positive is reconnected first is crucial to avoid creating a circuit when attaching the negative. A torque wrench is highly recommended here to ensure a proper, safe connection without damage.
- Final Check: Double-check that all connections are tight, the battery is secure, and the tray is properly installed. Close the hood. You can now start your car to ensure everything is working correctly.
Consider checking out resources from organizations like NHTSA (National Highway Traffic Safety Administration) for broader vehicle safety guidelines. They often have helpful information on maintaining your vehicle safely.
=H2=Battery Trays vs. Other Power Solutions=H2=
While we’re focused on car battery trays, it’s interesting to see how essential secure storage and reliable connections are across all our power needs. Whether it’s a car, a phone battery, or a power bank, reliable power delivery and safety are universal.
Here’s a quick comparison of how different power components rely on secure housing and connections:
| Component | Primary Function | Importance of Secure Housing/Connection | Potential Issues if Insecure |
|---|---|---|---|
| Car Battery | Starts engine, powers vehicle electronics. | Prevents electrolyte leaks, short circuits, physical damage from vibration. Ensures stable power flow. | Electrical fires, short circuits, battery damage, erratic electrical behavior, engine won’t start. |
| Phone Battery | Powers smartphone functions. | Maintains consistent contact with device terminals for reliable charging and power delivery. Battery swelling can damage phone. | Intermittent power, slow charging, device malfunction, potential damage to phone if battery expands. |
| Power Bank | Portable charging for devices. | Connectors (USB ports) must be robust. Internal battery secured to prevent damage and maintain connection to circuitry. | Device
Related Posts |