Bauer Battery Adapter for Power Wheels: A Simple Upgrade for More Playtime!
Transforming your child’s Power Wheels into a speedier, longer-lasting adventure is easier than you think with a Bauer battery adapter. This guide shows you how to connect a more powerful Bauer battery, giving your Power Wheels a significant boost in run time and performance. No complicated wiring, just simple steps for extended fun!
Ever notice how quickly your child’s Power Wheels battery runs out? It’s a common frustration for both kids eager to play and parents ready for a break. That familiar sigh when the ride slows to a crawl can mean playtime is over too soon. But what if there was a simple way to give those Power Wheels a serious upgrade? You can easily swap out the standard, short-lived battery for a more robust Bauer battery. This isn’t about complex electronics; it’s a beginner-friendly way to unlock more fun and excitement for your little drivers. Get ready to learn how a simple adapter can make a big difference, extending playtime and giving your Power Wheels a new lease on life.
Why Upgrade Your Power Wheels Battery?
That standard battery in most Power Wheels toys is designed for a balance of cost and playtime, but for many families, it just doesn’t cut it. Kids want to zoom, climb, and take on all sorts of imaginary terrains, and a weak battery can quickly put a damper on their adventures.
The Limitations of Standard Batteries
Most children’s ride-on toys come with sealed lead-acid (SLA) batteries. While they are safe and relatively inexpensive, they have a few drawbacks for enthusiastic young drivers:
Limited Run Time: You’re often lucky to get 20-40 minutes of continuous play on a single charge, especially if the toy is used on a tougher surface or carries a heavier child.
Slower Speeds: As the battery drains, the toy’s speed noticeably decreases, making the play experience less exciting.
Aging and Degradation: Like all batteries, they lose their capacity over time and with numerous charge cycles. Eventually, they just don’t hold a charge for long at all.
The Bauer Battery Advantage
Bauer batteries, often found in popular tool brands, offer a compelling alternative. They are typically lithium-ion or high-capacity lead-acid batteries that can provide significantly more power and longevity.
Extended Playtime: Bauer batteries can often double or even triple the run time of a standard Power Wheels battery.
Consistent Power: They tend to provide a more consistent power output throughout their discharge cycle, meaning less of that frustrating slow-down.
Durability: Many Bauer batteries, especially the lithium-ion ones, are built for demanding use and can withstand more charging cycles before degrading.
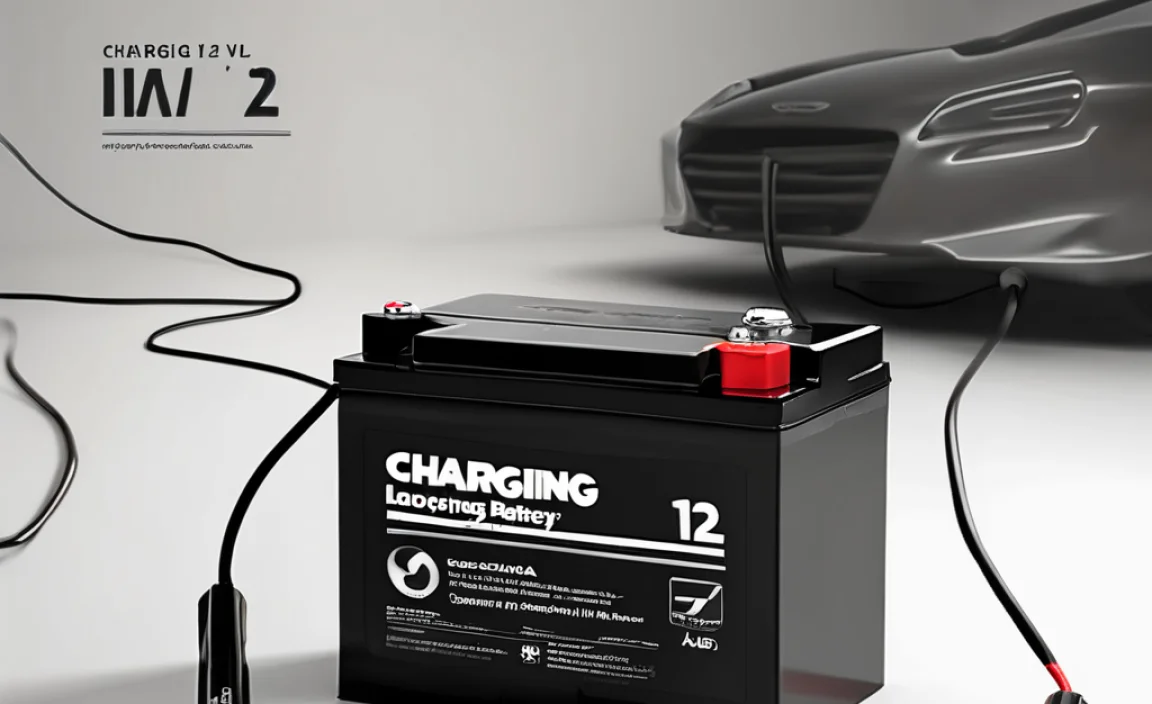
Understanding the Bauer Battery Adapter
Connecting a Bauer battery isn’t a direct swap. These batteries have different connectors and sometimes different voltage outputs than the original Power Wheels battery. This is where the Bauer battery adapter for Power Wheels comes in. It’s the crucial link that makes these two seemingly unrelated power sources compatible.
What is a Bauer Battery Adapter?
At its core, a Bauer battery adapter is a bridge. It’s essentially a set of wires and connectors designed to:
Convert Connectors: It takes the specific plug on a Bauer battery and transforms it into the connector that fits into your Power Wheels toy.
Manage Voltage (Sometimes): Some adapters might include features to handle minor voltage differences, though it’s best to match voltage as closely as possible for safety and optimal performance.
Ensure Secure Connection: It provides a safe and reliable way to link the higher-capacity battery to your child’s ride-on toy.
Common Types of Adapters
You’ll primarily find two common types of adapters for this purpose:
Pre-made Adapters: These are the easiest to use. They are often sold online and come with the correct connectors already attached. You simply plug one end into the Bauer battery and the other into the Power Wheels wiring harness.
DIY Adapters: For the more hands-on DIYer, you can create your own. This typically involves purchasing appropriate connectors (like spade connectors or Anderson Powerpole connectors) and some high-quality, flexible wire. This method requires basic wiring knowledge and tools.
Safety First: Essential Precautions
Before diving into the upgrade, safety is paramount. Working with batteries, especially higher-powered ones, requires a careful approach. Always remember that adult supervision is mandatory during installation and use.
Key Safety Considerations:
Voltage Matching: The most critical aspect is matching the voltage. A Power Wheels designed for a 12V battery should ideally be paired with a 12V Bauer battery. Connecting a significantly higher voltage (e.g., 18V or 20V Bauer battery to a 12V Power Wheels) can damage the toy’s motor, electronics, and wiring, creating a fire hazard.
Battery Type: While this guide focuses on adapters, be aware that different battery chemistries (like Lithium-ion vs. Sealed Lead-Acid) have different charging needs and safety protocols. Ensure your chosen method is compatible.
Fuse Protection: Many Power Wheels have a built-in fuse. Ensure your adapter and connections maintain this safety feature. If you’re building a DIY adapter, consider adding an inline fuse to protect the system from overcurrents.
Proper Connections: Loose or poorly made electrical connections can generate heat, melt plastic, and cause short circuits. Always ensure connections are clean, secure, and insulated.
Battery Handling and Charging: Always follow the manufacturer’s instructions for charging and handling both the Bauer battery and the Power Wheels. Never leave charging batteries unattended. For detailed battery care and safety, consult resources like Battery University’s safety section.
Original Charger: You will likely need a charger specifically designed for your Bauer battery. The original Power Wheels charger will not work with a Bauer battery.
Choosing Your Bauer Battery and Adapter
With safety covered, let’s talk about picking the right components. The goal is to find a Bauer battery that matches your Power Wheels’ voltage and an adapter that makes them compatible.
Matching Your Power Wheels Voltage
This is your first and most important step. Check the existing battery or the Power Wheels manual to determine its original voltage. Common voltages for Power Wheels are 6V, 12V, and sometimes 18V or 24V for more powerful models.
6V Power Wheels: Usually for younger children, smaller ride-ons. You’ll want a 6V Bauer battery.
12V Power Wheels: Very common for many standard models. A 12V Bauer battery is your target.
18V/24V Power Wheels: These are faster and more powerful. You’ll need an 18V or 24V Bauer battery set. Caution: Ensure the toy’s electronics can handle the specific voltage; some 18V/24V Power Wheels use proprietary battery packs that might be harder to adapt.
Popular Bauer Battery Options
Bauer typically offers batteries in various amp-hour (Ah) ratings. A higher Ah rating means more energy storage and thus longer run time. For tool batteries, 2.0Ah, 4.0Ah, and 5.0Ah are common. For Power Wheels, opting for a higher Ah rating will give you more playtime.
Finding the Right Adapter
Pre-made Adapters: Search online retailers like Amazon, eBay, or specialized Power Wheels modification sites using terms like “Bauer battery adapter for Power Wheels,” “Power Wheels battery conversion adapter,” or “Bauer to Power Wheels adapter.” Look for adapters specifically designed for your Bauer battery series (e.g., Bauer 20V MAX) and your Power Wheels voltage.
DIY Adapter Components: If you’re going the DIY route, you’ll need:
The correct mating connector for your Bauer battery (this can sometimes be tricky to source separately). Often, people purchase a Bauer battery with its original charger and then use a cable that plugs into the battery itself, cutting off the other end to wire into the Power Wheels.
The matching connector for your Power Wheels wiring harness (often female spade connectors for the toy side).
High-quality stranded wire (10-14 AWG is usually sufficient, thicker for higher current applications). Ensure it’s rated for the voltage and amp load.
Wire strippers, crimpers, and electrical tape or heat shrink tubing for insulation.
Tools You’ll Need
Whether you buy a pre-made adapter or build your own, a few basic tools will make the job much easier and safer.
Screwdriver Set: To open the Power Wheels housing if needed.
Wire Strippers/Cutters: Essential for preparing wires.
Wire Crimpers: If using spade connectors or other crimp-on terminals.
Pliers: For gripping and securing connections.
Electrical Tape or Heat Shrink Tubing: For insulating all connections.
Voltmeter (Optional but Recommended): To verify battery voltage, check connections, and troubleshoot.
Step-by-Step: Installing the Bauer Battery Adapter
Here’s how to make the connection. We’ll cover both pre-made adapters and a basic DIY approach.
Method 1: Using a Pre-Made Adapter
This is the simplest and safest method for most beginners.
-
Prepare the Power Wheels: Ensure the Power Wheels is turned OFF and the original battery is disconnected. If you need to access the battery compartment or wiring, consult your Power Wheels manual or search online for disassembly guides for your specific model. Often, the wiring harness for the battery is accessible directly under the seat or near the rear axle.
-
Identify Connectors: Locate the battery connector wires on your Power Wheels. They will typically be two wires (positive and negative) with a specific plug or bare wires. Also, identify the port on your Bauer battery that accepts its charger.
-
Connect the Adapter to the Bauer Battery: Take your pre-made adapter. One end will have the connector designed to plug directly into your Bauer battery. Simply plug this into the battery.
-
Connect the Adapter to the Power Wheels: The other end of the adapter will have connectors (often spade connectors or a matching plug) designed to connect to your Power Wheels wiring harness. Carefully connect these, ensuring the positive wire from the adapter connects to the positive wire on the Power Wheels and the negative to the negative. It’s crucial to get polarity right!
Tip: Use electrical tape or heat shrink tubing to secure and insulate the connections if they aren’t a tight plug-and-play fit.
-
Secure Everything: Tuck away any loose wires safely so they won’t get pinched or caught during operation. If you had to open the toy’s body, reassemble it.
-
Test Run: With the original Power Wheels battery still disconnected (to avoid confusion), connect the Bauer battery to the assembled adapter system. Turn on the Power Wheels and test its operation. It should respond more powerfully.
Method 2: Building a Basic DIY Adapter (For the Adventurous)
This method requires a bit more confidence with tools and wiring.
Components Needed:
- Bauer Battery
- Power Wheels toy
- A short length of high-gauge stranded wire (10-14 AWG)
- Connectors:
- One connector that mates with your specific Bauer battery (often tricky to buy loose, might need to adapt a charger cable or donor cable)
- Two female spade connectors that fit the Power Wheels battery terminals.
- Wire strippers and crimpers
- Electrical tape or heat shrink tubing
Steps:
-
Prepare the Bauer End: If you are using a charger cable that plugs into the battery, cut off the end that plugs into the wall adapter. Then, carefully strip a small section of the outer insulation to expose the positive (+) and negative (-) wires. If you have a direct battery terminal connector, prepare it similarly.
-
Connect Wire to Bauer End: Take your new length of wire. Connect one end to the positive wire from the Bauer battery connector and the other end to the negative wire. Use crimpers for a secure connection, then insulate thoroughly with electrical tape or heat shrink tubing. Ensure the positive wire is clearly marked.
Crucial: Getting polarity correct here is vital. Double-check which wire is positive and which is negative from your Bauer battery. Consult your battery or tool manual if unsure.
-
Prepare the Power Wheels End: Locate the battery wires on your Power Wheels. If they have spade connectors, you will connect your new wire to these. If they are bare wires, you’ll likely crimp new spade connectors onto them.
-
Connect Wire to Power Wheels End: Connect the positive wire from your new length of wire to the positive terminal/wire on your Power Wheels. Connect the negative wire to the negative. Crimp securely and insulate each connection individually.
-
Insulate and Secure: Wrap all connections with electrical tape or use heat shrink tubing for a clean, insulated finish. Ensure no bare wire is exposed anywhere. Neatly route and secure the new wiring so it doesn’t interfere with moving parts.
-
Test Carefully: Connect the Bauer battery. Double-check all connections. Turn on the Power Wheels to test its function. Listen for any unusual sounds and check that it operates smoothly.
Safety Note: If anything smells hot, looks abnormal, or makes strange noises, disconnect the battery immediately. It’s always best to double-check your work or seek help if you’re unsure.
| Feature | Standard Power Wheels Battery | Bauer Battery with Adapter Upgrade |
|---|---|---|
| Run Time | 20-40 minutes | 60-120+ minutes (depending on battery capacity) |
| Power Output | Decreases significantly as battery drains | More consistent power delivery |
| Recharge Time | Varies (often 8-12 hours) | Depends on Bauer battery model and charger (can be faster) |
| Initial Cost | Lower (included with toy) | Higher (cost of battery + adapter) |
| Performance Boost | Standard | Noticeably faster and more responsive |
| Complexity of Upgrade | N/A (original) | Simple to moderate (depending on adapter type) |
Troubleshooting Common Issues
Even with the best intentions, sometimes things don’t work perfectly. Here are a few common problems and how to fix them.
Power Wheels Not Turning On
Check Battery Charge: Is the Bauer battery fully charged according to its own charger’s indicator?
Verify Connections: Are all adapter connections secure and in the correct polarity (positive to positive, negative to negative)? Loose connections are a frequent culprit.
Check Fuse: Does the Power Wheels have an accessible fuse? If so, check if it has blown. If it has, this could indicate a short circuit or an overload.
Power Wheels Runs Slowly or Not at All
Incorrect Voltage: Did you match the voltage correctly? A brand new 12V battery might not have enough juice if the toy is designed for a higher voltage, or vice-versa, a too-high voltage could damage motors.
Loose Connections: Again, check all wired connections. Even a slight resistance can cause a voltage drop, making the motors run weakly.
Bad Battery: Although new, there’s a small chance the Bauer battery is faulty. Try testing it with its original tool if possible.
Adapter Gets Hot
*
Short Circuit: This is a serious issue. Immediately disconnect the battery. Inspect all wiring for exposed copper or crossed wires