Quick Summary:
Finding a reliable, cheap AGM car battery under $100 is possible. These batteries offer great performance for their price, especially for everyday drivers. This guide will show you what to look for and how to get a quality battery without breaking the bank.
Your car battery is the heart of your vehicle, and when it’s time for a replacement, the costs can sometimes feel like a sting. Especially if you’re looking for an Absorbed Glass Mat (AGM) battery, known for their durability and better performance, the price tag can seem a bit high. But what if I told you that snagging a quality AGM car battery for under $100 isn’t just a dream? It’s an absolutely achievable goal for savvy drivers. Many folks worry about getting a good deal and ending up with a dud, but that’s where I come in. I’m here to guide you through finding that essential, wallet-friendly find. We’ll break down what makes an AGM battery great, where to find these deals, and what to watch out for so you can drive away with confidence and cash in your pocket. Get ready to power up your ride without draining your finances!
The Power Under the Hood: Why AGM Batteries Shine
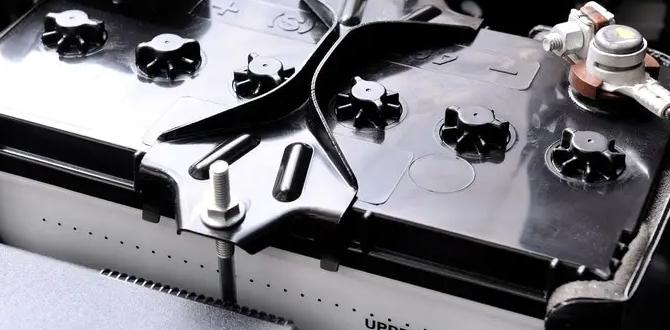
When we talk about car batteries, there are a few main types, but today, we’re focusing on AGM – that’s Absorbed Glass Mat. Think of it as a high-performance upgrade for your car’s power source. Unlike conventional lead-acid batteries, AGMs have an electrolyte that’s soaked into special mats made of fiberglass. This design makes them leak-proof and much more resistant to vibrations, which is great news for any car, especially those constantly on bumpy roads. They also tend to last longer and can handle deep discharges better than older battery types.
Why does all this matter for your wallet? Well, while an AGM battery might have a slightly higher upfront cost than a basic flooded battery, its longer lifespan and better reliability often make it more cost-effective in the long run. You’ll spend less time worrying about it failing unexpectedly and potentially save on towing or emergency service calls. Plus, many newer cars with advanced start-stop technology require AGM batteries to function correctly, so upgrading might even be a necessity.
Decoding the “Under $100” Reality
Let’s get straight to that magic number: under $100 for a quality AGM car battery. Is it truly possible? Yes, but it requires a bit of savvy shopping. The price of car batteries can jump around quite a bit. Factors like brand reputation, warranty length, and specific performance ratings (like Cold Cranking Amps – CCA) will influence the cost. Finding an AGM battery under $100 typically means you might be looking at:
- Slightly smaller Groups: Batteries for smaller cars or older vehicles might fit this price point more easily.
- Promotional Sales: Timing is everything! Keep an eye out for holiday sales, store-specific promotions, or clearance events.
- Less Premium Brands: While top-tier brands are fantastic, many other reliable manufacturers offer excellent AGM batteries at lower price points.
- Shorter Warranties: Sometimes, batteries priced lower might come with a 1- to 2-year warranty instead of a 3- or 4-year one. This is a trade-off to consider.
It’s important to strike a balance. A battery priced ridiculously low might be a red flag, but a well-researched option within this budget can be an excellent find. The goal is to get reliable power without overspending.
What to Look for in a Budget AGM Battery
When you’re hunting for that cheap AGM car battery under $100, don’t just grab the first one you see. Here’s a checklist of what’s important:
Key Specifications:
- Battery Group Size: This is crucial! Your car needs a specific group size to fit correctly in the battery tray and have the right terminal placement. Check your owner’s manual or look up your car’s specs online. Common sizes include 24, 35, 51R, and 65.
- Cold Cranking Amps (CCA): This tells you how much power the battery can deliver in freezing temperatures to start your engine. For most climates, aim for a CCA rating that meets or slightly exceeds your car manufacturer’s recommendation. You can usually find this on your old battery or in your manual.
- Reserve Capacity (RC): This indicates how long the battery can run essential accessories if your alternator fails. While less critical for daily driving, it’s a good indicator of overall battery health.
- Voltage: Almost all car batteries are 12 volts. Stick to that unless your vehicle is very specialized.
AGM-Specific Benefits:
- Sealed Design: Ensure it’s clearly marked as “AGM” and sealed. This means no spilled acid and better safety.
- Vibration Resistance: AGMs are naturally good at this, but it’s a key advantage to remember.
- Deep Cycle Capability: If your car has a start-stop system or you use a lot of electronics with the engine off, this is a big plus.
The Deal Factors:
- Warranty: Even under $100, look for at least a 1-year free replacement warranty. A 2-year warranty at this price point is a fantastic find.
- Return Policy: Understand the store’s policy in case the battery is DOA (Dead On Arrival) or doesn’t perform as expected.
- Brand Reputation: While not buying top-tier, research less common brands. Look for reviews that mention reliability and customer service.
Where to Score Your Cheap AGM Car Battery Under $100
Finding affordable automotive parts is all about knowing where to look. Here are the prime spots to hunt for a budget-friendly AGM car battery:
Online Retailers:
Websites like Amazon, Walmart’s online store, and dedicated auto parts e-commerce sites can be a goldmine. You’ll often see a wider selection and competitive pricing. Plus, customer reviews can give you a real-world idea of battery performance.
Big Box Auto Parts Stores:
Places like AutoZone, Advance Auto Parts, O’Reilly Auto Parts, and Pep Boys frequently have sales and promotions on car batteries. They often carry a range of brands, including their own house brands which can be more affordable. Don’t forget to check for online coupons and in-store pickup discounts. You can often check their stock and prices online before you even leave home.
Warehouse Clubs:
Costco and Sam’s Club are well-known for offering great deals on various products, and car batteries are no exception. They typically carry a limited selection, but the prices are often very competitive, especially considering the quality and warranty they offer. You usually need a membership to shop there.
Discount Retailers:
Check stores like Harbor Freight Tools. While they might not always have specific AGM car batteries priced under $100, they do run sales and offer their own brands that can sometimes hit this mark, especially if you use a coupon. Their warranties can vary, so always check the details.
Used/Reconditioned Batteries (Use with Caution):
Some battery shops or online marketplaces might offer reconditioned batteries at a lower price. While this can be a way to save money, it comes with higher risk. These batteries have been used before and may not have a long life left. If you go this route, ensure there’s a solid, short-term warranty (like 30-90 days) and be prepared for potential issues. For most drivers, a new, budget-friendly battery is a more reliable choice.
Comparing Budget AGM Batteries: A Snapshot
Prices can change daily, but here’s a general idea of what you might find. This table is illustrative and prices may vary significantly based on your location, current sales, and specific battery model.
| Brand Example | Typical Price Range (Under $100) | Warranty Example | Notes |
|---|---|---|---|
| Duracell (from AutoZone/Walmart) | $90 – $110 | 1-2 Years Free Replacement | Often a good balance of price and reliability. May require a coupon or sale to hit under $100. |
| EverStart (Walmart) | $80 – $100 | 1 Year Free Replacement | Walmart’s house brand, often very competitively priced. |
| ACDelco Advantage | $85 – $105 | 1-2 Years Free Replacement | Solid, reputable name, can sometimes be found on sale in this range. |
| Optima YellowTop/RedTop (Sale Price) | Often $150+; occasionally on deep clearance <$120-$130 | 3 Years Free Replacement | Premium batteries rarely fall under $100 new, but watch for major sale events. |
| DieHard (Advance Auto Parts) | $95 – $115 | 1-3 Years Free Replacement | Another popular brand; check for sales and coupons. |
Remember, the “under $100” goal is more achievable with brands that aren’t considered premium or during significant sales events. Always verify the group size for your specific vehicle.
Safety First: Handling Your New Battery
Working with car batteries, even a brand-new one, requires care. They contain corrosive acid and can produce explosive gases. Always prioritize safety!
Essential Safety Gear:
- Eye Protection: Safety glasses or goggles are a must to protect your eyes from acid splashes or debris.
- Gloves: Acid-resistant gloves will protect your skin.
- Old Clothing: Wear something you don’t mind getting dirty or potentially stained.
Safe Handling Practices:
- No Smoking or Open Flames: Batteries can release hydrogen gas, which is highly flammable. Keep sparks and flames far away.
- Work in a Well-Ventilated Area: Avoid changing your battery in a confined space like a tightly closed garage.
- Keep Metal Objects Away: Dropping a wrench or tool across the battery terminals can cause a dangerous short circuit, sparks, and even an explosion.
- Handle with Care: Don’t drop the battery. It’s heavy and can be damaged internally or externally.
- Proper Lifting: Bend your knees and lift with your legs, not your back, as batteries are surprisingly heavy.
If you feel unsure or uncomfortable at any point, don’t hesitate to seek professional help. Many auto parts stores offer battery installation services, often for a small fee or even for free with purchase.
How to Choose the Right Battery Group Size (It’s Easier Than You Think!)
Getting the right size battery is non-negotiable. A battery that’s too small might not stay secure, and one that’s too large simply won’t fit. Thankfully, this information is readily available:
- Check Your Owner’s Manual: This is the most reliable source. It will specify the recommended battery group size(s) for your vehicle.
- Look at Your Old Battery: The group size is usually printed on a label on the side of your current battery. You might need to clean it off a bit to see it clearly.
- Consult Online Resources: Most auto parts store websites (like AutoZone, Advance Auto Parts) have a “Find Your Part” tool. You enter your car’s year, make, model, and engine size, and it will show you compatible battery group sizes and specific models. You can also find this information on reputable automotive sites like Edmunds.com or Cars.com by looking up your vehicle’s specifications.
- Ask a Professional: If you’re still unsure, pop into an auto parts store or a mechanic. They can quickly tell you the correct size.
Common battery group sizes include:
- Group 24: Often found in Japanese vehicles like Toyota and Honda, and some American sedans.
- Group 35: Also common in Japanese cars and some American models.
- Group 51R: Typically used in smaller Japanese vehicles, often with reversed terminal posts.
- Group 65: Frequently used in larger American sedans, trucks, and SUVs.
Make sure to note the terminal orientation. Some batteries have positive and negative terminals on the same side, while others have them on opposite sides. The “R” in a group size (like 51R) often indicates reversed terminals.
Installation: A DIY Guide for the Budget-Conscious
Replacing your car battery yourself can save you money and give you a sense of accomplishment. With the right tools and a bit of care, it’s a very doable task for most drivers.
Tools You’ll Likely Need:
- Wrench Set or Socket Set: You’ll need a specific size socket or wrench to remove the battery terminal clamps (usually 10mm or 13mm) and another size for the battery hold-down bracket.
- Battery Terminal Cleaner Brush: This wire brush helps clean corrosion from the terminals and clamps for a good connection.
- Gloves and Safety Glasses: As mentioned before, these are essential.
- Anti-Corrosion Spray or Dielectric Grease (Optional but Recommended): Apply this to the clean terminals to prevent future corrosion and improve conductivity.
- A Rag or Paper Towels: For wiping things clean.
- A Friend (Optional): An extra pair of hands can be helpful, especially for lifting the old battery out.
Step-by-Step Installation:
- Park Safely: Ensure your car is parked on a level surface, the engine is off, and the parking brake is engaged.
- Locate the Battery: It’s usually under the hood, but some vehicles have it in the trunk or under a seat. Consult your owner’s manual if you’re unsure.
- Disconnect the Negative Terminal FIRST: Using your wrench, loosen the nut on the negative (black, “-“) terminal clamp. Wiggle the clamp off the terminal post. Tuck it aside so it can’t accidentally touch the battery post. This is the most critical safety step! Disconnecting the negative first prevents accidental short circuits.
- Disconnect the Positive Terminal SECOND: Now, loosen the nut on the positive (red, “+”) terminal clamp. Wiggle it off.
- Remove the Hold-Down Bracket: Batteries are secured with a bracket, usually at the base or top. Locate the bolt(s) holding it and remove them. Keep the bracket and bolts somewhere safe.
- Remove the Old Battery: Carefully lift the old battery out of the tray. Remember, it’s heavy. If it’s difficult to lift, check for any hidden straps or brackets.
- Clean the Battery Tray and Cables: Use your rag to wipe out any debris or residue from the battery tray. Inspect the cable ends and clean them with the terminal cleaner brush if they look corroded.
- Install the New Battery: Place the new AGM battery into the tray, ensuring it’s oriented correctly with the positive and negative terminals in the right positions.
- Reinstall the Hold-Down Bracket: Secure the new battery with the bracket and bolts. Make sure it’s snug so the battery won’t move.
- Connect the Positive Terminal FIRST: Place the positive (red, “+”) cable clamp onto the positive terminal post. Tighten the nut securely.
- Connect the Negative Terminal SECOND: Place the negative (black, “-“) cable clamp onto the negative terminal post. Tighten the nut securely.
- Apply Anti-Corrosion Treatment (Optional): Spray a bit of anti-corrosion spray or apply dielectric grease to the terminals and clamps.
- Double-Check Connections: Ensure both terminals are tight and secure, and that the battery hold-down is firm.
- Start Your Car: Start the engine to ensure everything is working correctly. Your car’s clock and radio presets might need to be reset.
For more visual guidance, resources like the U.S. Department of Energy’s Vehicle Technologies Office offer information on battery maintenance, and countless YouTube tutorials demonstrate the process clearly. For instance, checking out guides from places like NHTSA (National Highway Traffic Safety Administration) on vehicle maintenance can provide valuable context on why proper connections and handling are so important for safety.