Quick Summary:
Refurbish golf cart batteries by cleaning existing ones, properly charging them, and using a desulfator to revive them. This guide offers simple steps for DIY battery restoration, extending their life and saving you money.
Golf carts are great for getting around the course or your neighborhood. But when their batteries start to fade, it can be a real bummer. Replacing them can cost a lot of money. The good news is, sometimes you can bring those old batteries back to life! It’s called refurbishing, and it’s not as scary as it sounds. This guide will walk you through it, step by step, so you can get your golf cart rolling again without breaking the bank.
We’ll cover what you need, how to do it safely, and when it might be time to hang up the towel and get new batteries. Ready to give your golf cart batteries a second chance?
Understanding Your Golf Cart Batteries
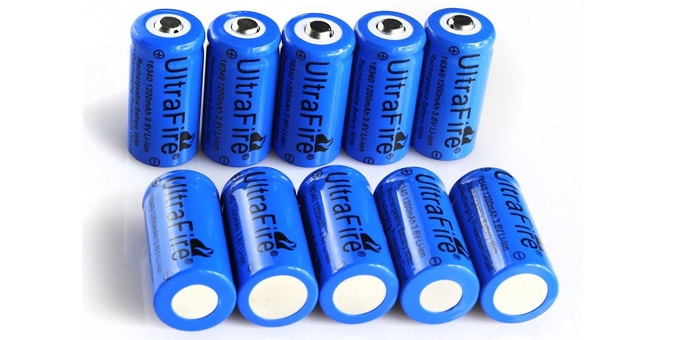
Most golf carts use 6-volt, 8-volt, or 12-volt deep-cycle lead-acid batteries. These are designed to be discharged more deeply and recharged more often than the starter batteries in your car. Over time, a few things can happen to make them seem dead:
- Sulfation: This is the biggest culprit. When a lead-acid battery discharges, tiny crystals of lead sulfate form on the plates. If the battery sits discharged for too long, these crystals can grow large and hard, preventing the battery from accepting a charge.
- Low Water Levels: In flooded lead-acid batteries, the electrolyte (a sulfuric acid and water mixture) needs to be at a certain level. If it drops too low, the plates can be exposed and damaged.
- Corrosion: Connections can corrode, impeding the flow of electricity.
- Age: Even with the best care, batteries have a lifespan.
Refurbishing primarily targets sulfation and low water levels. It’s about giving the battery a chance to operate as it should again. It’s important to know that not all batteries can be saved. If a battery is physically damaged, has cracked casing, or is simply too old, refurbishing won’t bring it back.
Is Refurbishing Right for You?
Before you dive in, consider these points:
Pros of Refurbishing:
- Cost Savings: This is the biggest reason people try it. New golf cart batteries can cost hundreds or even thousands of dollars.
- Environmental Benefit: Extending the life of batteries means fewer old batteries end up in landfills.
- Learning Experience: You’ll gain a better understanding of how batteries work.
Cons of Refurbishing:
- Not Always Successful: Some batteries are beyond repair.
- Time and Effort: It takes time to do it properly.
- Potential Safety Risks: Working with batteries involves acid and potentially explosive gases. Safety is paramount.
- May Not Restore Full Capacity: A refurbished battery might not perform exactly like a brand-new one.
Safety First! Essential Precautions
Working with lead-acid batteries requires care. They contain sulfuric acid, which is corrosive, and they can produce explosive hydrogen gas during charging. Always:
- Wear Safety Gear: Always wear safety glasses or goggles, rubber gloves, and old clothes.
- Work in a Ventilated Area: Never charge batteries in an enclosed space. A garage with the door open is usually fine, but avoid workshops with poor airflow.
- No Sparks or Flames: Keep anything that could cause a spark (like smoking, open flames, or metal tools touching battery terminals) far away from the batteries. Hydrogen gas is highly flammable.
- Neutralize Spills: Have a baking soda and water solution ready to neutralize any spilled acid.
- Handle with Care: Batteries are heavy. Lift them properly and be careful not to drop them.
- Isolate Batteries: If you’re refurbishing a set, disconnect them completely.
Tools and Materials You’ll Need
Gather these items before you start:
| Item | Description |
|---|---|
| Safety Glasses/Goggles | Essential for protecting your eyes. |
| Rubber Gloves | Thick, chemical-resistant gloves. |
| Battery Terminal Cleaner Tool | A brush designed to clean battery posts and clamps. |
| Wire Brush | For cleaning corroded terminals and connections. |
| Hydrometer | Measures the specific gravity of the electrolyte, indicating charge level. Get one designed for automotive/deep cycle batteries. |
| Distilled Water | Only use distilled water to top off flooded batteries. Tap water contains minerals that can damage the battery. |
| Battery Terminal Protector Spray | Helps prevent future corrosion. |
| A Good Quality Golf Cart Battery Charger | Ensure it’s compatible with your battery voltage (e.g., 36V or 48V). A smart charger is best. |
| Battery Desulfator (Optional but Recommended) | An electronic device that uses high-frequency pulses to break down sulfate crystals. |
| Wrench Set | To disconnect and reconnect battery cables. |
| Baking Soda and Water Mixture | For neutralizing acid spills. Mix about 1 tablespoon of baking soda with 1 cup of water. |
Step-by-Step Guide to Refurbishing Golf Cart Batteries
This process assumes you have flooded lead-acid batteries, which are common in golf carts. They have removable caps on top to check and add water.
Step 1: Disconnect and Remove Batteries
For safety and ease of access, it’s best to remove the batteries from the golf cart. If you’re working on a series of batteries (e.g., six 6-volt batteries making up a 36V system), disconnect them one by one to avoid shorting them.
- Turn off the golf cart and remove the key.
- Using a wrench, loosen the nut on the negative (-) terminal cable and disconnect it. Tuck it away so it can’t accidentally touch the terminal.
- Repeat for the positive (+) terminal cable.
- Carefully lift out the batteries. They are heavy, so get help if needed.
Step 2: Clean the Batteries and Terminals
Corrosion and dirt can impede charging. A clean battery performs better.
- Using your wire brush and battery terminal cleaner, scrub the battery posts and cable clamps thoroughly.
- Wipe down the top of the batteries and the surrounding area with a damp cloth. Be careful not to let dirty water seep into the battery cells.
- Apply a thin layer of battery terminal protector spray to the posts or a dielectric grease after cleaning.
Step 3: Check Electrolyte Levels
This is crucial for flooded lead-acid batteries. Low water levels can ruin battery plates.
- With the batteries upright and cool, carefully remove the cell caps.
- Using your hydrometer, draw some electrolyte from each cell. Check the specific gravity reading. A reading between 1.265 and 1.280 usually indicates a fully charged battery. If the reading is significantly lower, the battery is discharged, and this is where refurbishment can help. Record your readings for each cell.
- Check the electrolyte level against the indicator ring inside each cell, or ensure the plates are fully submerged by at least 1/4 inch (6mm) of liquid.
- If the level is low, carefully add just enough distilled water to cover the plates or reach the indicator mark. Do not overfill.
- Replace the cell caps.
Important Note: Never add acid to a battery unless you’re absolutely sure it’s an acid-only issue and you know what you’re doing. This guide focuses on water levels and sulfation.
Step 4: Charge the Batteries
This is where the magic often happens, especially for sulfated batteries. A slow, steady charge is best.
- Connect your golf cart charger to the batteries. Double-check that the voltage and amperage settings on your charger are correct for your battery pack (e.g., 36V or 48V).
- Follow your charger’s instructions. For a deeply discharged or possibly sulfated battery, a longer, slower charge is often more effective than a quick fast charge. Some chargers have a specific “equalization” or “reconditioning” mode.
- Important: Ensure good ventilation during charging. The batteries can give off hydrogen gas.
- Monitor the charging process. A good charger will typically show when charging is complete. A full charge can take 8–12 hours, or even longer for very discharged batteries.
Step 5: Use a Battery Desulfator (Optional but Recommended)
If you suspect severe sulfation, a desulfator can be a game-changer.
- Connect the desulfator in parallel with the battery (usually to the charger terminals or directly to the battery posts).
- Many desulfators can be left connected continuously, even while charging. Some pulse specifically to break down sulfate crystals without damaging the battery.
- Follow the manufacturer’s instructions for your specific desulfator. Some recommend running it for a few days or weeks, alongside regular charging, to see results.
- You can find high-quality desulfators from reputable brands like NOCO or Battery Clinic.
Step 6: Re-check Electrolyte Levels and Specific Gravity
After charging, the electrolyte levels might have changed. Re-test to assess the battery’s condition.
- Carefully remove the cell caps again.
- Check the electrolyte level. Top up with distilled water ONLY if the plates are exposed. Again, do not overfill.
- Use your hydrometer to measure the specific gravity of each cell. If the readings are now much closer together (within 0.020 of each other) and are in the healthy range (around 1.265-1.280), your battery has likely been revived.
- If readings are still very low or uneven after an extended charge, the battery may not be salvageable.
Step 7: Reinstall and Test
Once you’re satisfied with the results, it’s time to put them back to work.
- Carefully place the batteries back into the golf cart, ensuring they are in the correct order and orientation.
- Reconnect the cables, ensuring the positive (red, +) terminal is connected first, followed by the negative (black, -) terminal. Tighten the nuts securely, but don’t overtighten.
- Use your battery terminal protector spray on the connections.
- Now it’s time for a test drive! See how well your golf cart performs.
Maintaining Your Refurbished Batteries
To keep your refurbished batteries in good shape and prevent future issues:
- Charge Regularly: Never leave your golf cart batteries in a discharged state. Charge them after every significant use.
- Don’t Over-Discharge: Avoid running your batteries down too deeply. This is hard on them and accelerates sulfation.
- Check Water Levels Monthly: For flooded batteries, this is a must. Top up with distilled water whenever needed.
- Keep Them Clean: Regularly clean the tops of the batteries and the terminals to prevent corrosion.
- Monitor Connections: Ensure cables are tight and free from corrosion.
- Use a Smart Charger: A good quality charger will protect your batteries from overcharging.
- Consider a Desulfator: Leaving a desulfator connected can help prevent sulfate buildup. Organizations like the EPA emphasize proper battery maintenance to maximize lifespan.
When to Give Up and Buy New Batteries
Sometimes, refurbishment just won’t work. You should consider buying new batteries if:
- Physical Damage: Cracked cases, bulging sides, or terminal corrosion that won’t clean off indicate a battery that needs replacement.
- Very Low Specific Gravity Readings: If even after a long charge, specific gravity readings in all cells are consistently low (below 1.200) and uneven, the battery has likely lost its ability to hold a charge.
- Short Lifespan: If your batteries are only 1–2 years old and perform poorly, they might have been abused or were defective from the start. Refurbishing may help temporarily, but their useful life is likely over.
- No Improvement: If you’ve followed all the refurbishment steps and you see no improvement in the battery’s ability to hold a charge or provide power, it’s time to let go.
- Battery Age: Most golf cart batteries have a lifespan of 3–5 years with proper care. If yours are pushing or past this age, they’re simply worn out.
Frequently Asked Questions (FAQ)
Q1: How long does it take to refurbish golf cart batteries?
The entire process, including multiple charges, can take several days to a couple of weeks, especially if you’re using a desulfator. A single refurbishment attempt might involve a full charging cycle of 8-12 hours or more.
Q2: Can I use tap water instead of distilled water?
No, absolutely not. Tap water contains minerals that will contaminate the electrolyte and permanently damage your battery plates, reducing its performance and lifespan.
Q3: What is a deep-cycle battery?
A deep-cycle battery is designed to be discharged significantly and recharged repeatedly. Golf cart batteries are typically deep-cycle batteries, unlike car batteries which are designed for short bursts of high power. Understanding this difference is key to proper care.
Q4: My battery is bulging. Can I fix it?
A bulging battery case often indicates internal damage, possibly from overcharging or freezing. Unfortunately, this type of damage is usually irreversible, and the battery should be replaced for safety reasons. Do not attempt to refurbish a bulging battery.
Q5: How do I know if my golf cart batteries are really dead?
If your golf cart won’t move, or only moves very slowly, and the batteries show low voltage (e.g., less than 1.75 volts per 6V battery, or 3.5 volts per 12V battery) even after a charging attempt, they might be dead. Checking specific gravity readings and their inability to rise after charging are also strong indicators.
Q6: Is it safe to leave a desulfator connected all the time?
Most modern electronic desulfators are designed to be safely left connected. They use high-frequency pulses rather than a constant current. Always follow the manufacturer’s instructions for your specific device to ensure safe and effective use.
Conclusion
Refurbishing golf cart batteries can be a rewarding DIY project. By following these steps carefully, prioritizing safety, and understanding the limitations, you can often revive old batteries, saving yourself a significant amount of money and reducing waste. Remember to keep up with regular maintenance to get the most life possible out of your batteries, whether they’re refurbished or brand new.