Quick Summary: Your car battery terminals accumulate corrosion, hindering performance and starting. Using a proper battery cleaner, a wire brush, and protective gear will safely remove this in minutes, ensuring a reliable connection and a healthier battery for your car. It’s a simple yet crucial maintenance step any driver can do.
Is your car acting sluggish to start, or have you noticed a fuzzy, white or bluish crust on your battery terminals? Don’t worry, it’s a common issue that’s surprisingly easy to fix! This crust, called battery terminal corrosion, can block the electrical flow, making your car harder to start and even causing bigger problems down the line. Many people think they need a mechanic for this, but with the right tools and a few simple steps, you can clean your car battery terminals yourself. It’s a smart way to keep your ride running smoothly and save a trip to the shop. Ready to make your car battery happy again? Let’s get started with this essential guide!
Why Keeping Your Car Battery Terminals Clean Matters

Your car battery is the heart of your vehicle’s electrical system. It provides the power needed to crank the engine and run all the electronics. The terminals are where the battery connects to the rest of the car’s wiring. Over time, a chemical reaction occurs. Gases escape from the battery electrolyte, mix with air and metal, and create that tell-tale white or bluish powdery substance. This is corrosion.
This corrosion acts like an insulator, making it harder for electricity to flow. Think of it like trying to send a signal through a thick blanket – it gets muffled or blocked entirely. This can lead to:
- Slow engine cranking (that struggling sound when you turn the key)
- The battery warning light coming on
- Complete failure to start
- Damage to sensitive electronic components
Regularly cleaning your battery terminals is a simple, proactive step that can prevent these headaches. It ensures a strong, reliable connection, which means your car will start consistently and your electrical systems will function as they should. It’s a small bit of maintenance that pays off big time in reliability and preventing costly repairs.
What You’ll Need: Essential Tools for Battery Cleaning

Before you start, gather these simple items. Having everything ready makes the job quick and safe. You can find most of these at an auto parts store or even a local grocery store.
- Safety Glasses: This is non-negotiable! Battery acid can irritate your eyes.
- Gloves: Protect your hands from grease, grime, and any potential battery acid.
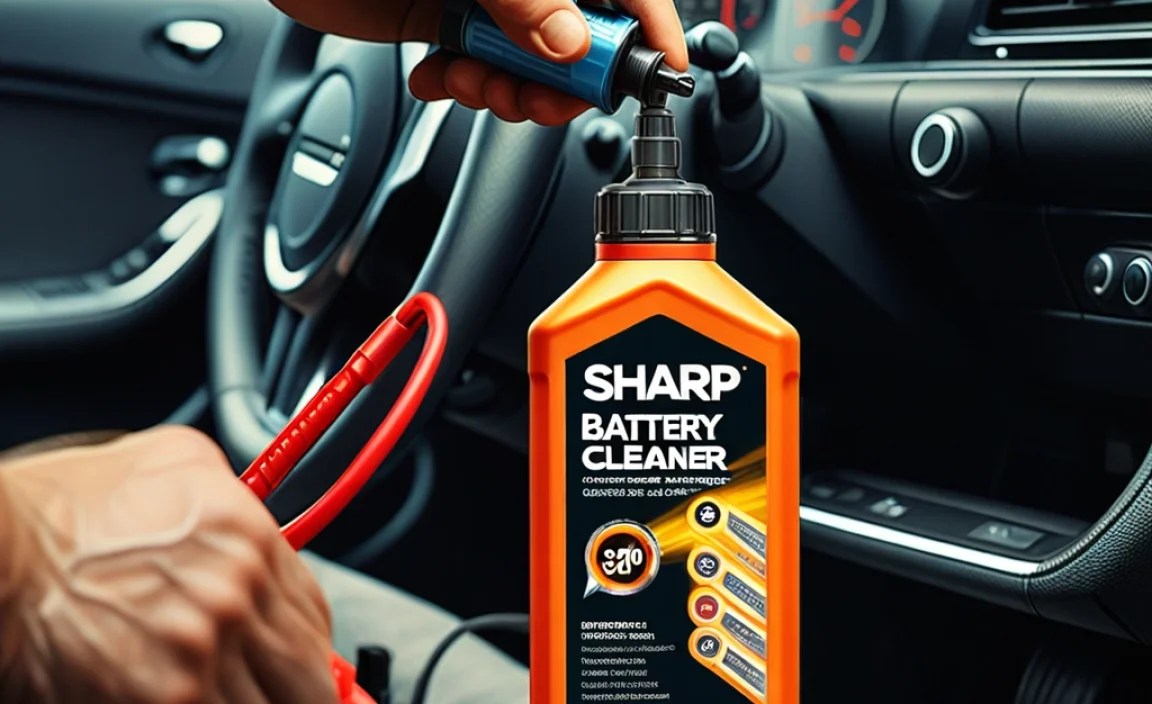
- Battery Terminal Cleaner Spray or Paste: These are specifically designed to neutralize corrosion and protect terminals. They often change color when they’re working.
- Wire Brush (Battery Terminal Brush is ideal): A stiff brush with wire bristles is key to scrubbing away stubborn corrosion. A cone-shaped battery brush is perfect as it fits right over the posts and inside the cable clamps.
- Rag or Paper Towels: For wiping away loosened corrosion and cleaner.
- Optional: Baking Soda and Water Paste: A natural alternative if you don’t have commercial cleaner. Mix about a tablespoon of baking soda with a bit of water to make a paste.
- Optional: Dielectric Grease: After cleaning, applying a thin layer of this protects against future corrosion.
Having the right tools makes the job not only easier but also much safer. Proper safety gear like glasses and gloves are crucial because car batteries contain corrosive sulfuric acid. You can learn more about battery safety from the Environmental Protection Agency (EPA), which also has resources on battery recycling.
Step-by-Step Guide: How to Clean Your Car Battery Terminals Safely

Cleaning your car battery terminals is a straightforward process. Follow these steps carefully for the best and safest results.
Step 1: Prepare Your Vehicle and Yourself
Park your car on a level surface and turn off the engine. Engage the parking brake. Open the hood and locate your car battery. It’s usually under a plastic cover or strapped down securely. Once you have access, put on your safety glasses and gloves.
Step 2: Disconnect the Battery Cables
This is a critical safety step. Always disconnect the negative (black, “-“) terminal first. You’ll typically use a wrench to loosen the nut on the clamp and then gently twist and pull the cable off the battery post. Once the negative cable is off, disconnect the positive (red, “+”) terminal. Leaving the negative disconnected prevents accidental sparks if your wrench touches metal parts of the car while you’re working on the positive terminal.
For most vehicles, you’ll need a simple wrench, often a 10mm or 13mm. If you’re unsure, consult your car’s owner’s manual. Disconnect the cables by loosening the nut on the clamp. Once loose, gently wiggle and pull the clamp off the battery post. If the cables are stuck, a cable puller tool can help, but often a gentle twist is enough.
Step 3: Clean the Battery Terminals and Cable Clamps
Now it’s time to tackle that corrosion. If you’re using a commercial battery terminal cleaner, spray it onto the battery posts and the inside of the cable clamps. You might see it fizz or change color – that means it’s working to break down the corrosion. Let it sit for a minute or two as directed by the product.
If you’re using the baking soda and water paste, apply it generously to the corroded areas. The baking soda will help neutralize the acid and loosen the corrosion.
After the cleaner or paste has done its work, use your wire brush (or battery terminal brush) to scrub away all the loosened corrosion. For the battery posts, use the cone-shaped part of the brush. For the inside of the cable clamps, use the other end or a smaller brush. You want to see shiny metal on both the posts and the clamps.
Step 4: Rinse and Dry (Carefully!)
If you used a commercial cleaner, some may recommend rinsing. Check the product’s instructions. If you used baking soda paste, you’ll want to rinse the area thoroughly with clean water. Be very careful not to get water into the battery vents, if your battery has them. A damp rag can also be used to wipe away residue.
Once everything is clean, dry the battery posts and cable clamps thoroughly with a clean rag or paper towels. It’s important that these parts are dry before reattaching them to prevent new corrosion from forming quickly.
Step 5: Reconnect the Battery Cables
This is the reverse of disconnecting. First, reconnect the positive (red, “+”) cable to its terminal post. Make sure it’s snug and secure. Then, reconnect the negative (black, “-“) cable. Again, tighten the clamp securely. Wiggle the cables to ensure they are firmly attached and won’t easily move.
A good connection is vital. You should aim for a tight fit that doesn’t allow any wiggle room. This ensures optimal electrical contact and prevents future corrosion from forming due to loose connections.
Step 6: Apply Protective Coating (Optional but Recommended)
For added protection against future corrosion, you can apply a thin layer of dielectric grease or a specialized battery terminal protector spray. This creates a barrier that repels moisture and prevents the chemical reactions that cause corrosion. Apply it to the terminals and inside the clamps after they are reconnected and snug.
Step 7: Start Your Car and Test
Close the hood, remove your safety gear, and start your car. It should crank over more easily. Take a short drive to ensure everything sounds and feels normal. Check your dashboard for any warning lights.
Troubleshooting Common Battery Terminal Issues
Even with careful cleaning, you might encounter a few snags. Here’s how to handle them:
- Stubborn Corrosion: If the corrosion is very thick and hard to remove, you might need to repeat the cleaning process. Let the cleaner soak longer, or try a stiffer wire brush. A battery terminal cleaner tool with a built-in brush can be very effective here.
- Damaged Cables or Clamps: If you notice that the cable clamps are cracked, corroded beyond repair, or if the wires inside the cable look frayed, it might be time to replace the cable. This is a job for a mechanic or someone experienced with automotive electrical systems.
- Battery Still Won’t Start: If cleaning the terminals doesn’t solve your starting problems, the issue might be with the battery itself (it could be old and ready to die), the alternator, or another part of the starting system. A load test at an auto parts store can tell you the condition of your battery.
Battery Cleaner vs. DIY Solutions: What’s Best?

While baking soda and water is a common and effective DIY solution, dedicated battery terminal cleaners offer some advantages.
Here’s a quick comparison:
| Feature | Dedicated Battery Cleaner | Baking Soda & Water |
|---|---|---|
| Effectiveness | Formulated to neutralize acid and inhibit corrosion. Often changes color indicating action. | Effective at neutralizing acid and loosening corrosion due to its alkaline properties. |
| Ease of Use | Spray-on, wipe-off application; designed for direct terminal contact. | Requires mixing, applying paste, and thorough rinsing. |
| Corrosion Inhibitors | Many contain ingredients to leave a protective coating. | Does not typically leave a protective coating; requires separate application (like dielectric grease). |
| Cost | Slightly higher upfront cost for the product. | Very inexpensive; uses common household items. |
| Availability | Auto parts stores, online. | Grocery stores, your pantry. |
For most DIYers, especially beginners, a good quality battery terminal cleaner is often the simplest and most effective route because it’s a complete solution. However, if you need a quick fix or prefer natural solutions, baking soda and water is a solid alternative.
How Often Should You Clean Your Car Battery Terminals?
There’s no strict rule, but a good practice is to check your battery terminals at least twice a year, perhaps during your regular oil changes or before and after winter. If you live in a climate with extreme temperatures or if your car sits for long periods, an inspection every few months might be beneficial.
Signs that you need to clean them sooner include:
- Difficulty starting your car.
- A visible build-up of white or bluish powder on the terminals.
- The battery warning light illuminating on your dashboard.
Catching corrosion early is key to preventing it from becoming a major problem. Think of it as routine check-ups for your car’s power source.
Understanding Battery Voltage and Terminal Types
Most passenger cars use a 12-volt battery system. This is fairly standard across vehicles. The voltage is crucial for the car’s electronics to function correctly. When cleaning, you’ll notice the battery posts are of different sizes. The positive post is slightly larger than the negative post. This is a safety feature to ensure you connect the cables to the correct terminals, preventing accidental short circuits.
The clamps on your battery cables are designed to fit these posts snugly. You might have different types of clamps, but the basic principle of a secure connection remains the same. Always ensure the clamp fits flush and tight on the post.
When to Consider a New Battery
Cleaning terminal corrosion is maintenance, not a cure for a dying battery. If you clean your terminals and your car still struggles to start, or if the battery dies quickly after being charged, it’s likely time for a new battery. Batteries typically last 3-5 years, depending on climate and usage. You can get your battery tested for free at most auto parts stores by asking them to perform a “load test.” This test measures the battery’s ability to deliver power under load, giving you a clear indication of its health.
Conclusion
Taking care of your car battery terminals by cleaning them regularly with a dedicated battery cleaner and a wire brush is a straightforward, cost-effective way to ensure your car starts reliably. It’s a DIY task that builds confidence and helps you avoid unexpected breakdowns. By following these simple steps, using the right tools, and prioritizing safety, you can maintain a healthy connection for your car’s electrical system. Remember to check them periodically, especially during seasonal changes, and you’ll be well on your way to a smoother, more dependable driving experience. Happy motoring!
Frequently Asked Questions (FAQs)
What is battery terminal corrosion?
Battery terminal corrosion is a powdery, white, bluish, or greenish substance that builds up on your car battery’s posts and cable clamps. It’s caused by a chemical reaction from battery gasses escaping and mixing with the metal terminals.
Is battery acid dangerous?
Yes, car batteries contain corrosive sulfuric acid. It can irritate skin, damage eyes, and burn through clothing. Always wear safety glasses and gloves when working with car batteries.
Can I use WD-40 to clean battery terminals?
While WD-40 can sometimes loosen corroded parts, it’s not the best solution for cleaning battery terminals. It’s a lubricant and water displacer, not an acid neutralizer. Dedicated battery terminal cleaners or a baking soda solution are more effective at removing corrosion and protecting the terminals.
How do I know if my battery needs replacing instead of just cleaning?
If cleaning the terminals doesn’t improve starting issues, or if the battery repeatedly dies quickly, it’s likely time for a new one. Most auto parts stores offer free battery testing that can tell you its condition.
How long does it take to clean car battery terminals?
When you have all your tools ready, cleaning car battery terminals usually takes about 10-15 minutes.
Can I clean the battery terminals with the engine running?
Never clean battery terminals with the engine running. Always ensure the engine is off and the battery cables are disconnected (negative first, then positive) before you begin cleaning.